- makeITcircular 2024 content launched – Part of Maker Faire Rome 2024Posted 1 month ago
- Application For Maker Faire Rome 2024: Deadline June 20thPosted 3 months ago
- Building a 3D Digital Clock with ArduinoPosted 8 months ago
- Creating a controller for Minecraft with realistic body movements using ArduinoPosted 8 months ago
- Snowflake with ArduinoPosted 9 months ago
- Holographic Christmas TreePosted 9 months ago
- Segstick: Build Your Own Self-Balancing Vehicle in Just 2 Days with ArduinoPosted 9 months ago
- ZSWatch: An Open-Source Smartwatch Project Based on the Zephyr Operating SystemPosted 10 months ago
- What is IoT and which devices to usePosted 10 months ago
- Maker Faire Rome Unveils Thrilling “Padel Smash Future” Pavilion for Sports EnthusiastsPosted 11 months ago
DIY a Raspberry Pi Zero Powered Chess Challenger

This Raspberry Pi Zero powered retro themed Chess Challenger, is an open source hardware design capable of running an up to date open source chess engine, Stockfish.
The original game was devised by Fidelity Electronics, and took the form of a chess set with what appeared to be a calculator of some sort built into the corner of the board. This “calculator” allowed for players to input grid positions that they were moving from and to, then output where the black pieces (and only the black) would move in response.
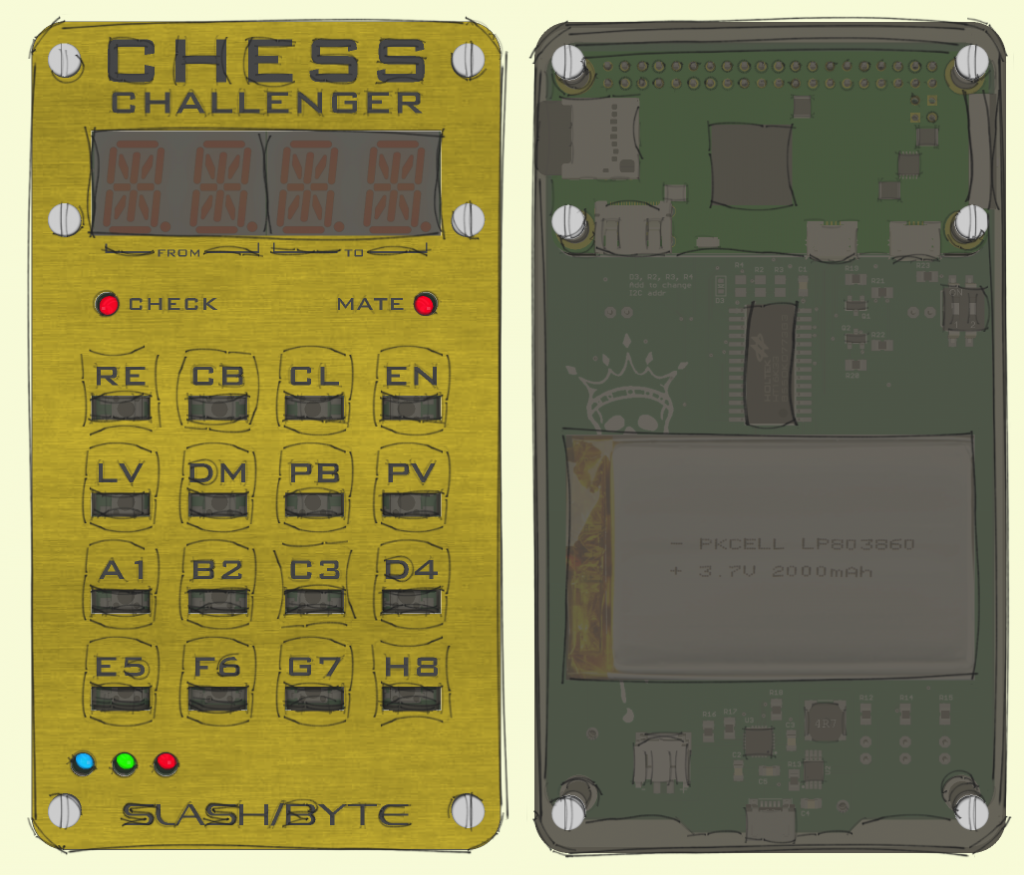
The modern version designed by Slash/Byte, unlike the original, only features the calculator portion, leaving mere human competitors to procure a board. It’s brilliantly styled in a metallic finish, with 14-segment character displays, making it appear like something out of the ’70s or early ’80s.
“The pocket sized chess computer uses a “sandwich” style construction which shows off the internals while still keeping things reasonably protected. All of the electronics are housed on the center custom PCB which features a HT16K33 driver for the dual LTP-3784E “starburst” LED displays, a MCP1642B voltage regulator, 16 TL3305 tactile switches for the keyboard, and a MCP73871 battery management chip for the 3.7 volt lithium-ion battery that powers the whole show. The Pi Zero itself connects to the board by way of the GPIO header, and is mechanically supported by the standoffs used to hold the device together.”
All you need to do it yourself is available on GitHub.


