- makeITcircular 2024 content launched – Part of Maker Faire Rome 2024Posted 1 month ago
- Application For Maker Faire Rome 2024: Deadline June 20thPosted 3 months ago
- Building a 3D Digital Clock with ArduinoPosted 8 months ago
- Creating a controller for Minecraft with realistic body movements using ArduinoPosted 8 months ago
- Snowflake with ArduinoPosted 9 months ago
- Holographic Christmas TreePosted 9 months ago
- Segstick: Build Your Own Self-Balancing Vehicle in Just 2 Days with ArduinoPosted 9 months ago
- ZSWatch: An Open-Source Smartwatch Project Based on the Zephyr Operating SystemPosted 10 months ago
- What is IoT and which devices to usePosted 10 months ago
- Maker Faire Rome Unveils Thrilling “Padel Smash Future” Pavilion for Sports EnthusiastsPosted 11 months ago
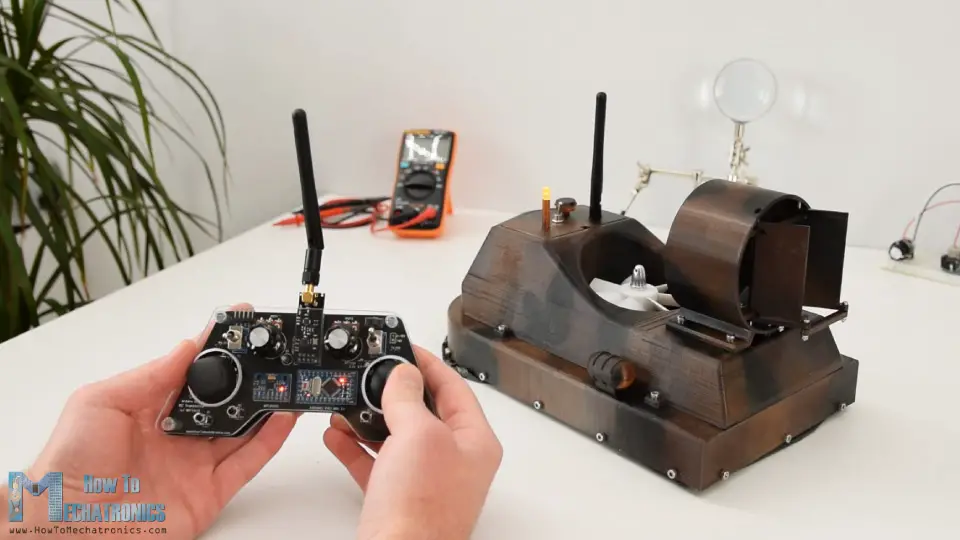
DIY Arduino based RC Hovercraft
In this tutorial we will learn how to build an Arduino based RC Hovercraft. I will show you the entire process of building it, starting from designing and 3D printing the hovercraft parts, including the propellers, to connecting the electronics components and programming the Arduino.
Overview
For controlling the hovercraft, I used my DIY Arduino based RC Transmitter which I made in one of my previous videos. I set the right joystick to control the servo motor for positioning the rudders on the back side of the thrust motor, set one of the potentiometers to control the lift propeller which is actually attached on a brushless DC motor, and set the left joystick to control the propulsion. So, let’s take a look what it takes to build this RC hovercraft.

Related Posts

-
 Arduino ISP (In System Programming) and stand-alone circuits
We use an Arduino to program other ATmega without...
- Posted 12 years ago
-

-

-
 GSM GPS shield for Arduino
Shield for Arduino designed and based on the module...
- Posted 12 years ago
-
 Small Breakout for SIM900 GSM Module
Some post ago we presented a PCB to mount...
- Posted 13 years ago
-
 makeITcircular 2024 content launched – Part of Maker Faire Rome 2024
Applications to MakeITcircular must be in by October 3,...
- Posted 1 month ago
-
 SONY color camera module, 700 TV Lines
Color camera module equipped with a 1/3″ CCD sensor...
- Posted 2 months ago
-
 ESP32 Low Power Module
ESP32 Low Power Module, based on Espressif’s SoC capable...
- Posted 3 months ago
-

-
 Application For Maker Faire Rome 2024: Deadline June 20th
Learn More About the Ideas, Makers + Projects at...
- Posted 3 months ago